Standard Workflow
INFO
This guide walks through the essential steps to set up streaming in a new scene.
Requirements
Editor Requirements
Before you start, make sure that you have the following:
- The primary requirements of ProStream are that of the Data Oriented Technology Stack (DOTS/ECS)
- Unity 2022.3.0f1 or later (Unity 6.4 is recommended)
- Scriptable Render Pipeline (SRP) installed and configured (URP or HDRP)
- Any additional requirements as specified by the DOTS/ECS packages for your Editor version or target platform
Additional Requirements and Recommendations
- API Compatibility Level set to .Net Standard (required)
- Scene GameObjects which are to be converted to Entities need to be Prefabs
- (Recommended) Scene Prefabs are children of an Empty Root-Level Parent GameObject
INFO
Newer versions of Unity have both API Compatibility Level and Editor API Compatibility Level settings.
Recommended Project Settings
To take full advantage of ProStream and the Data Oriented Technology Stack, it is recommended to use the following settings:
| Setting | Value |
|---|---|
| Scripting Backend | IL2CPP |
| API Compatibility Level | .Net Standard 2(.1) |
| Graphics APIs | Vulkan, Metal, or DX11/12 |
| Incremental GC (Garbage Collection) | Enabled |
:::
TIP
If you haven't installed ProStream yet, see Setup
Step 1: Setup Scene for ProStream
Open the ProStream Editor window: Tools | instance.id | ProStream | ProStream Editor
Click the Setup Current Scene button
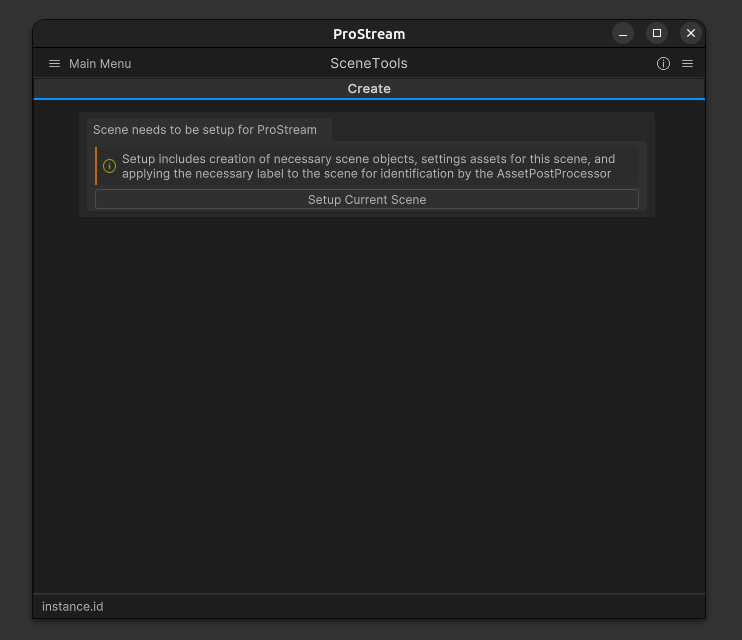
- ProStream validates and registers the current scene
- ProStream creates and wires required scene objects and assets in a single synchronous pass
- Wait for the process to complete (no scene reload required)
What just happened:
- ProStream created a SceneConnector GameObject:
SceneConnector (automatically created)
  SceneConnectorData
  WorkflowContainer
  SceneSearchFilterManager
  SelectionGroupContainer
VisualizationManager- Created asset directory structure in
SceneName/PSSceneData/ - Created SceneLock, LayerData, SceneSettings, InstanceObjectCollection and UserRuleCollection assets
- Initialized default layers (Ground, LargeObjects, MediumObjects, SmallObjects, Foliage)
- Copied example rules to your scene
- Scene is now ready for configuration
INFO
Setup is performed in a single pass. Depending on editor state, you may still see UI refreshes during or after setup.
Step 2: Add Scene Search Filters
Scene Search Filters define which areas of your scene ProStream will process. You select structural parent GameObjects, and ProStream tracks prefab children under them.
In the ProStream Editor window, click Add Search Filters button
A hierarchy selector window will open showing recommended filter candidates
Select one or more parent GameObjects that contain the objects you want to stream
- Typically these are parent GameObjects organizing your scene content
- Example: "Buildings", "Props", "Vegetation"
- You can select multiple GameObjects (hold Ctrl/Cmd)
Click Confirm in the selector window
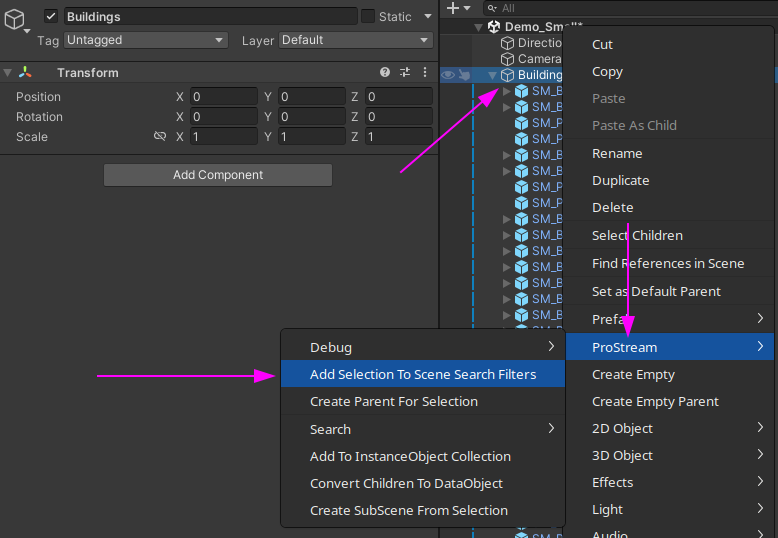
What just happened:
- ProStream added
SceneSearchFiltercomponents to your selected GameObjects - Found all prefab instances under those GameObjects
- Added
MatchTrackercomponents to each prefab child - Set tracker status to "Searchable"
- Only objects under search filters will be processed for streaming
Organization tip
Search filters help organize large scenes. Only prefab instances under filter GameObjects are tracked for streaming. This improves performance by limiting the scope of object tracking.
Step 3: Configure Match Rules
Match rules categorize objects into streaming layers (Ground, Large Objects, Small Objects, etc.).
In the ProStream Editor window (if closed, reopen via Tools | instance.id | ProStream | ProStream Editor)
In the Scene Tools tab, click the Setup Match Rules button
- This opens the Rule Editor menu with all available rules
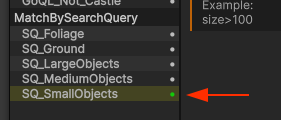
Browse the rule list organized by type:
- MatchBySearchQuery - Rules using Unity Search queries
- MatchByGOQLRule - Rules using GameObject Query Language
- MatchByDefault - Fallback rule for unmatched objects
- MatchByComponent - Manual rule assignment using a component on GameObjects
Enable rules for your scene:
- Locate the rules you wish to enable
- Double-click a rule to enable it or
- Right-click and select Add to Scene from context menu
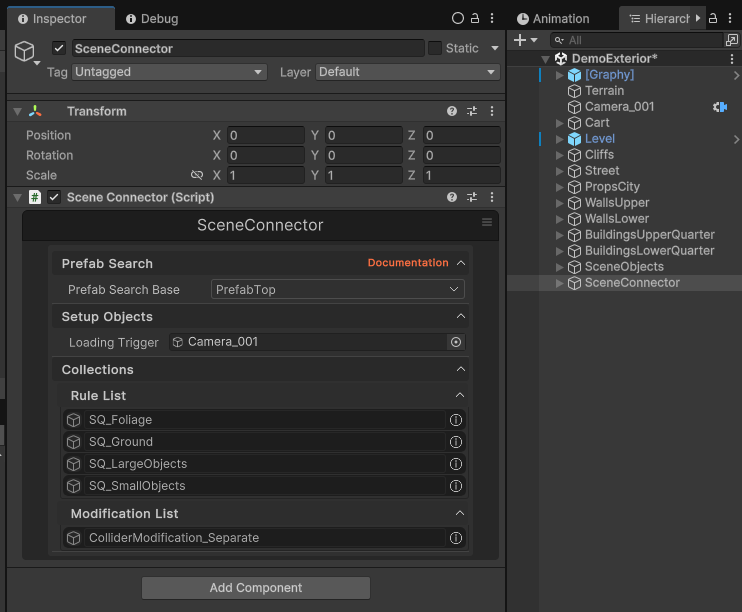
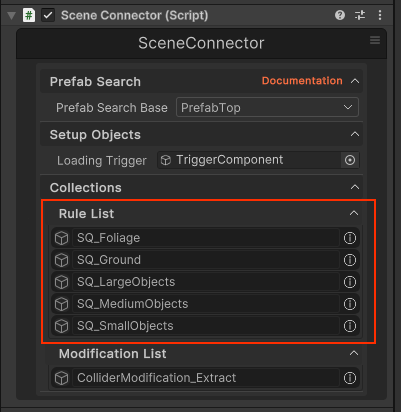
You can also verify enabled rules by viewing the SceneConnector's inspector:
- Verify rules are enabled:
- Select the
SceneConnectorGameObject - Check the inspector for enabled rules in the list
- Enabled rules will show up in the
Rule List
- Select the
Rule Execution Order
Rules are processed in list order. The first matching rule wins. The MatchByDefault rule automatically runs last to catch any unmatched objects.
Quick Tip
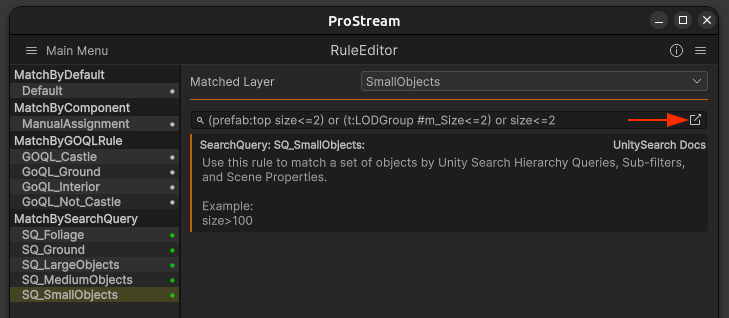
You can also single-click a rule to select it and view its properties in the inspector
You can edit and preview query results by clicking the icon on the right side of the query input box:
Step 4: Configure Streaming Layers
Layers determine loading distances for different object types.
In ProStream Editor, open the Layers tab
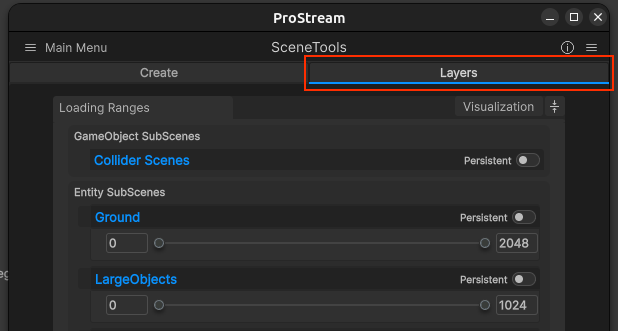
In the Layer Data editor, you can adjust the distance in which each SubScene layer will load into the scene.
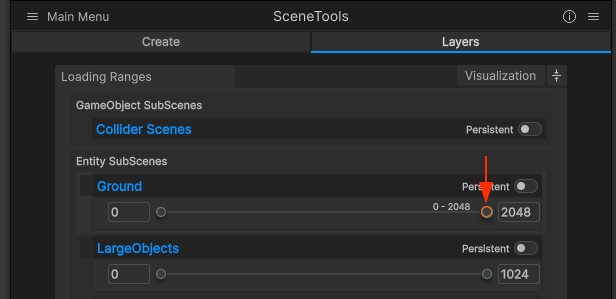
Distance Guidelines
- Higher number = The farther away the Loading Trigger can be for the SubScene layer to load
- Lower number = The closer the Loading Trigger must be for the SubScene Layer to load
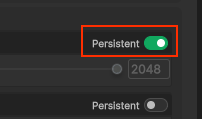
Persistent Layers: Layers marked as Persistent are always loaded and don't need a range set:
Use persistent sparingly for always-on critical content, because it bypasses normal distance streaming.
See Streaming Layers for detailed configuration.
Step 5: Prepare Scene
This is where ProStream utilizes modular Workflows (e.g., InstanceObjectsWorkflow, ColliderObjectsWorkflow) to validate objects, apply your matching rules, and generate spatial data (like QuadTrees) for your scene.
In the ProStream Editor window (if closed, reopen via Tools | instance.id | ProStream | ProStream Editor)
Go to the Setup tab
Click Prepare Scene button
Wait for processing to complete (progress bar will show)
If you get warning or error feedback
- Check Console for specific messages
- Ensure at least one rule is enabled
- Verify at least one Scene Search Filter is added
- Verify your enabled rules actually match your prefab objects
- See Troubleshooting
See Prepare Scene Process for complete details.
Step 6: Create SubScenes
Now create the actual SubScene files that will stream at runtime.
In ProStream Editor (still on Setup tab)
- The Create SubScenes button becomes available after Prepare Scene completes successfully
Click Create SubScenes button
Wait for processing (this may take a minute)
What's happening:
- ProStream creates scene files (.unity) for each spatial region
- Objects are cloned into appropriate SubScenes and sections
- Scene is reloaded to finalize changes
After Completion:
- Check Project | Assets | SubScene_Assets | YourSceneName | Entity
- You should see multiple
.unityfiles (one per spatial region)
See SubScene Creation Process for complete details.
Step 7: Test in Play Mode
Time to see streaming in action!
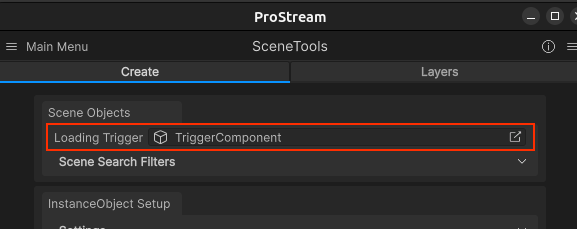
- Ensure your scene has a Camera or Player controller and it is assigned to the Loading Trigger field in the ProStream Editor or SceneConnector
Enter Play Mode
Move the camera/character around the scene
What to observe:
- SubScenes load/unload as you move
- Objects appear/disappear based on distance
Performance Check
Open Window | Analysis | Profiler to monitor memory and CPU usage. SubScenes should load/unload efficiently without major spikes in cpu or memory.
- If you see performance issues, ensure that your subscenes are not too large (too many objects in one subscene can cause spikes)
- Too many small subscenes can also cause overhead of constantly loading/unloading scenes for small movements. Aim for a balance based on your scene's content and scale.
Next Steps
Congratulations! You now have a working ProStream setup.
Refine Your Configuration
Improve Rule Matching
- Create custom rules for specific object types
- Adjust rule priorities
- See Rule Engine
Optimize Streaming
- Adjust layer distances based on object importance
- Use Persistent layers for always-loaded objects
- See Streaming Layers
Add Modifications
- Separate Colliders for physics interaction
- Combine meshes
- See Modification Engine
Learn More
Essential Reading
- Prepare Scene Process - Understand rule matching
- SubScene Creation Process - Understand SubScene generation
- Runtime Systems - How streaming works at runtime
Common Quick Start Issues
Expand to troubleshoot common setup issues
Setup button says 'Scene must be saved'
- Solution: ProStream requires scenes to be saved to disk before setup. Save your scene via File | Save Scene first.
SceneConnector not created after setup
- Check the Console for any errors during setup
- Look for
SceneName/PSSceneData/folder in your Assets
No SearchFilter Objects found
- Solution: You forgot Step 2! Click "Add Search Filters" in ProStream Editor and select parent GameObjects that contain your prefabs.
No MatchTrackers added
- Check: Your selected GameObjects contain prefab instances (not regular GameObjects)
- Prefabs are children of the search filter GameObject
- Check Console for processing messages
No rules have been added
- Solution: Enable at least one rule in the Rule Editor (Step 3).
No objects matched
- Rules are enabled (checkmark in Rule Editor)
- Rules actually match your objects (test queries in Unity Search:
Ctrl+K) - Confirm objects are prefab instances under selected search filter parents
SubScenes empty in Play Mode
- Check: Prepare Scene completed successfully
- SubScene creation completed successfully
- Check SubScene
.unityfiles - open them to verify objects are inside - Check Console for errors
Streaming not working
- Check: You're in Play Mode
- Camera/player is moving around
- Streaming distances are appropriate for your scene size
- StreamingManager exists in scene (auto-created after SubScene creation)
For more issues, see Troubleshooting
What You Learned
- How to set up ProStream in a scene
- How to configure search filters and rules
- How to set up streaming layers
- How to run the Prepare Scene process
- How to create SubScenes
- How to test streaming behavior
You're now ready to use ProStream in your projects!
See Also
Getting Started
Core Concepts
Processes