Sample Project Quickstart
INFO
The focus of this guide is to get you up and running quickly with a new Unity project using the ProStream sample package.
Requirements
Before you start, make sure that you have the following:
- The primary requirements of ProStream are that of the Data Oriented Technology Stack (DOTS/ECS)
- Unity 2022.3.0f1 or later (Unity 6.4 is recommended)
- Scriptable Render Pipeline (SRP) installed and configured (URP or HDRP)
- Any additional requirements as specified by the DOTS/ECS packages for your Editor version or target platform
Additional Requirements and Recommendations
- API Compatibility Level set to .Net Standard (required)
- Scene GameObjects which are to be converted to Entities need to be Prefabs
- (Recommended) Scene Prefabs are children of an Empty Root-Level Parent GameObject
INFO
Newer versions of Unity have both API Compatibility Level and Editor API Compatibility Level settings.
Recommended Project Settings
To take full advantage of ProStream and the Data Oriented Technology Stack, it is recommended to use the following settings:
| Setting | Value |
|---|---|
| Scripting Backend | IL2CPP |
| API Compatibility Level | .Net Standard 2(.1) |
| Graphics APIs | Vulkan, Metal, or DX11/12 |
| Incremental GC (Garbage Collection) | Enabled |
:::
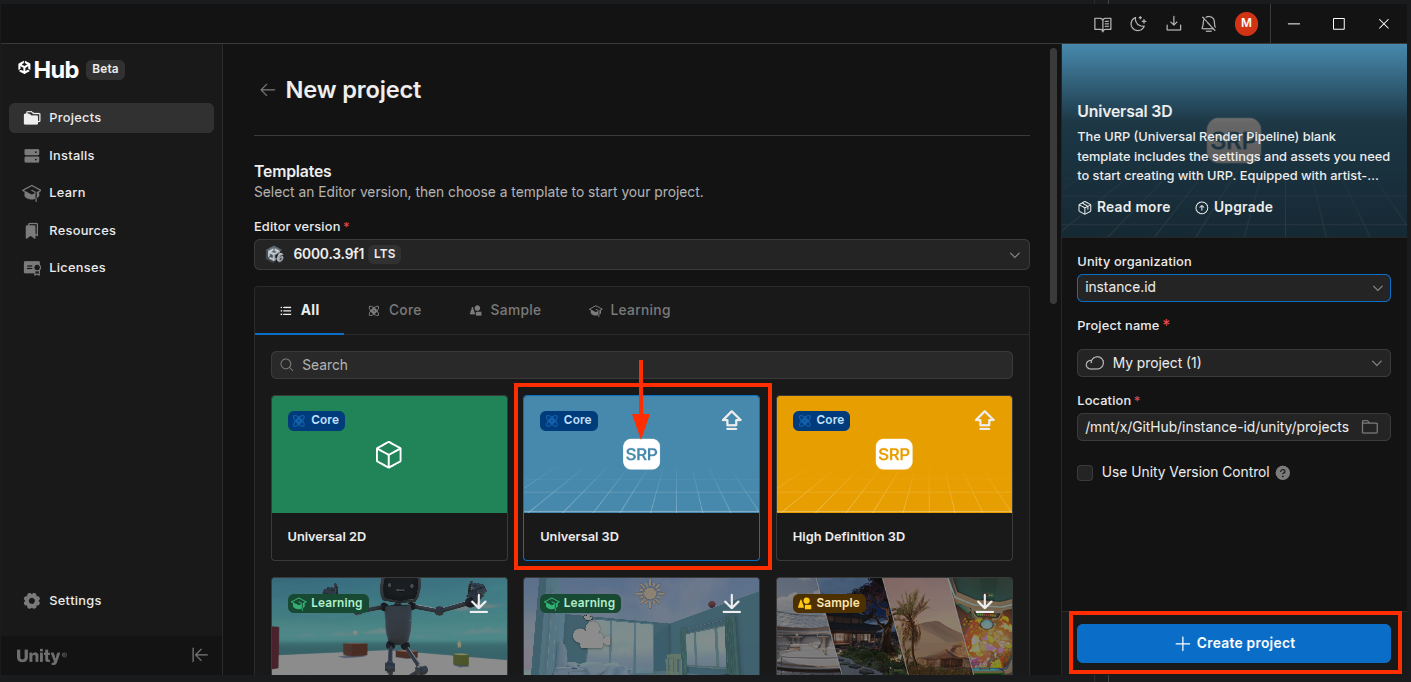
1) Create a New Unity URP Project
Create a new Unity project using the URP Core template via Unity Hub.
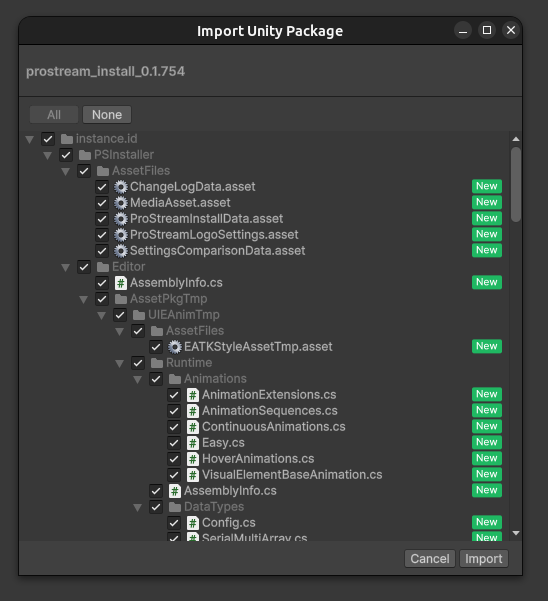
2) Import the ProStream Package
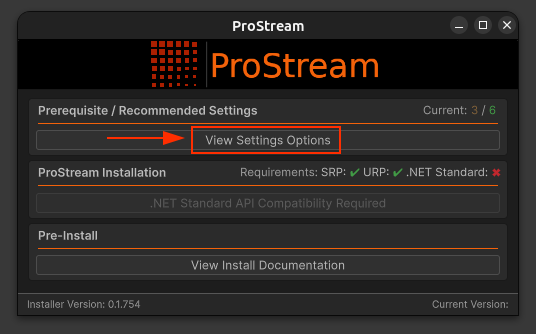
Project Settings
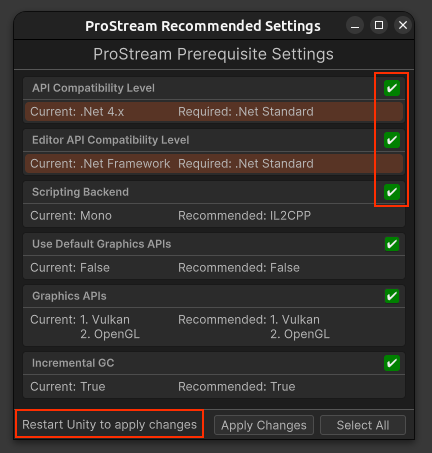
From the ProStream Setup window, select the "View Settings Options" button.
The Setup Assistant window will show you the required and recommended settings for your project (with required items being highlighted in orange) Check the boxes of the changes you wish to apply, then click the "Apply Changes" button to apply them.
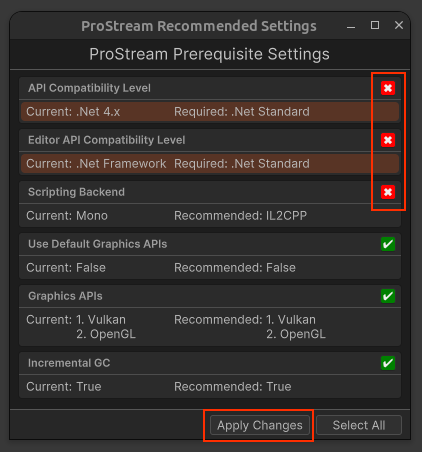
Manual Configuration
These settings can also be configured manually in Project Settings > Player > Other Settings.
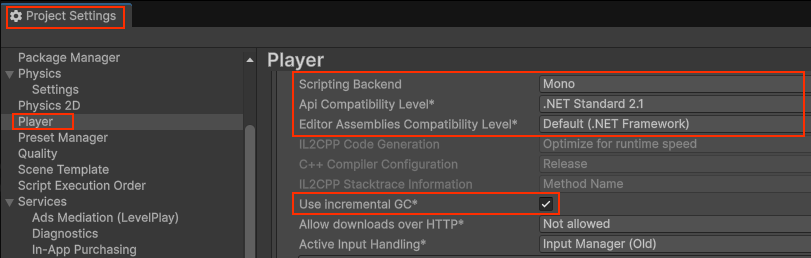
You will be prompted to restart the Editor if necessary.
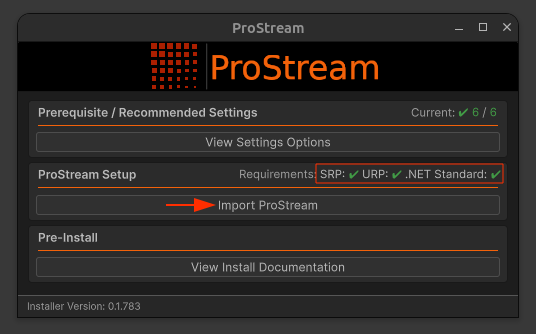
3) Import ProStream and Dependencies
Once the requirements are met, you can import ProStream and its dependencies via the Import ProStream button.
4) Import Sample Assets
After the installation is complete, you can import the sample assets via the View Samples button. This will open the Package Manager to the ProStream package page and Samples tab.
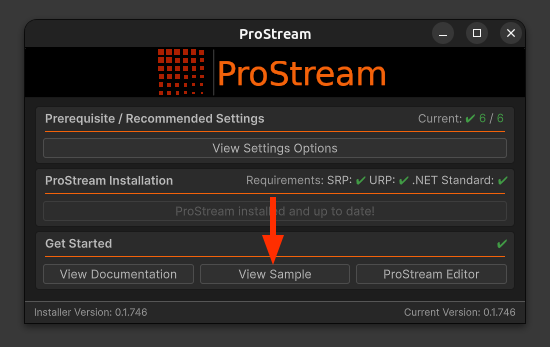
Press the "Import" button to import the sample assets into your project.
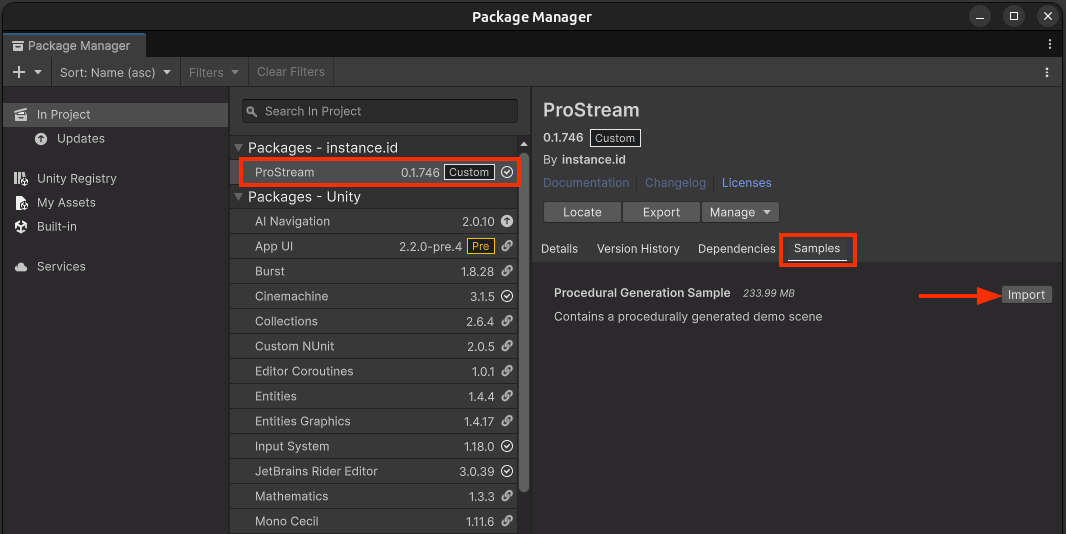
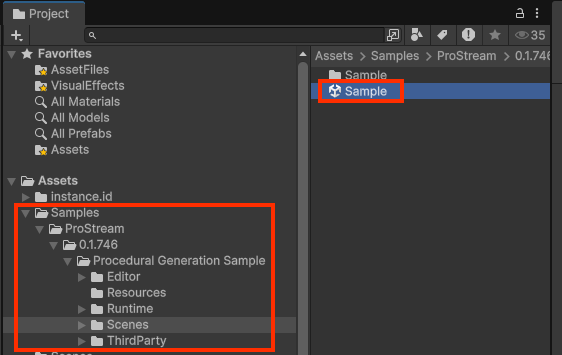
The samples will be imported into the Assets/Samples/ProStream/<package_version>/Procedural Generation Sample/ folder.
Open Sample Scene
Navigate to the Assets/Samples/ProStream/<package_version>/Procedural Generation Sample/Scenes folder and open the Sample.unity scene.
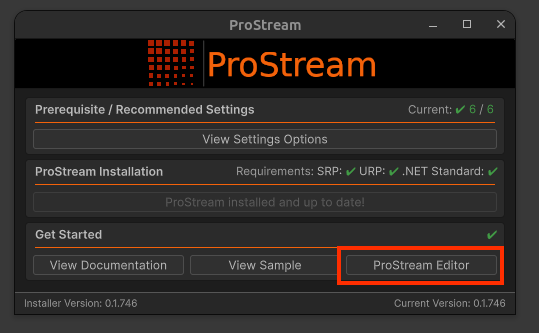
5) Open ProStream Main Editor
The ProStream Main Editor can be opened in two ways:
- A. From the ProStream Setup window, select the "ProStream Editor" button.
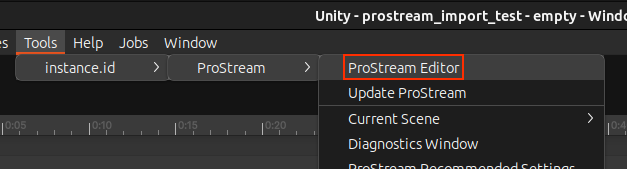
- B. From the Unity Editor menu, select "Tools > instance.id > ProStream > ProStream Editor" to open the main editor window.
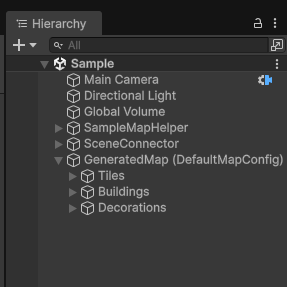
The sample scene and its associated assets are pre-configured to quickly get started and demonstrate ProStream.
6) Prepare Scene
From the ProStream Main Editor, press the "Prepare Scene" button.
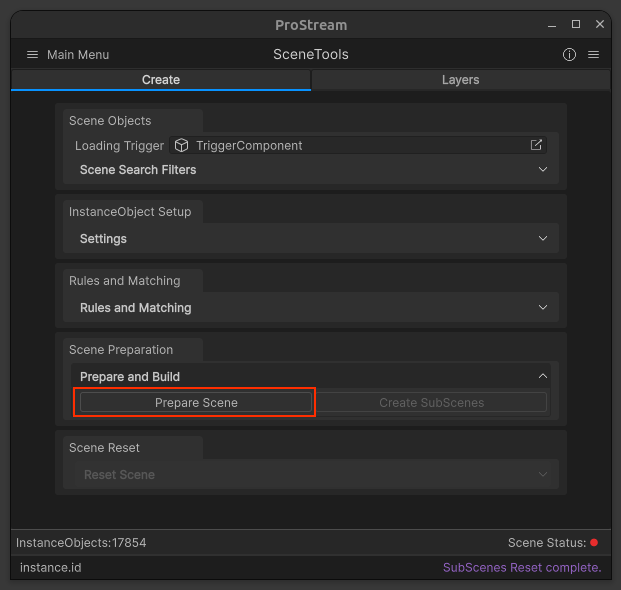
What happens during Prepare Scene?
- Create quadtree grid structures and calculates spatial data
- Runs checks against GameObjects and Components (validate materials, colliders, shaders, etc)
- Runs rule matching systems to categorize GameObjects into logical layers/sections (e.g., ground, buildings, vegetation)

7) Create SubScenes
When the Prepare Scene process is complete, the "Create SubScenes" button will become available. Press this button to begin the subscene creation process.
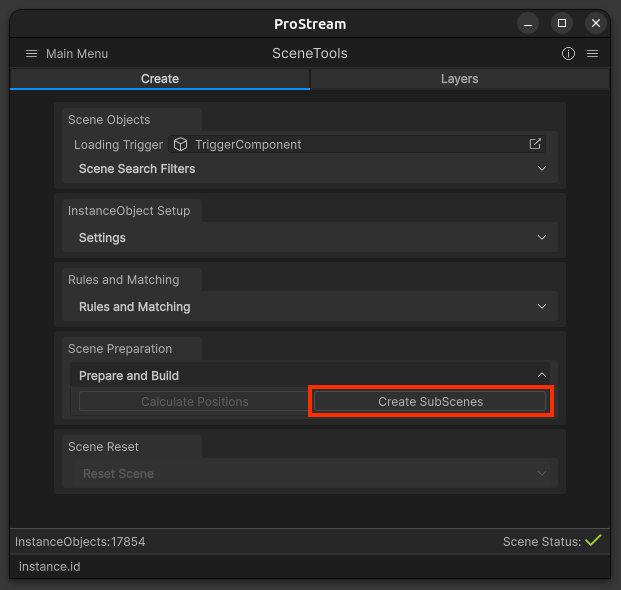
The "Create SubScenes" process is the final major editor step that converts prepared scene data into actual Unity SubScene assets.
This process takes the QuadTree structure and StreamingManager from the Prepare Scene phase and creates SubScene asset files, populating them with cloned GameObjects organized by streaming sections. This enables streaming based on player position and distance settings per layer.
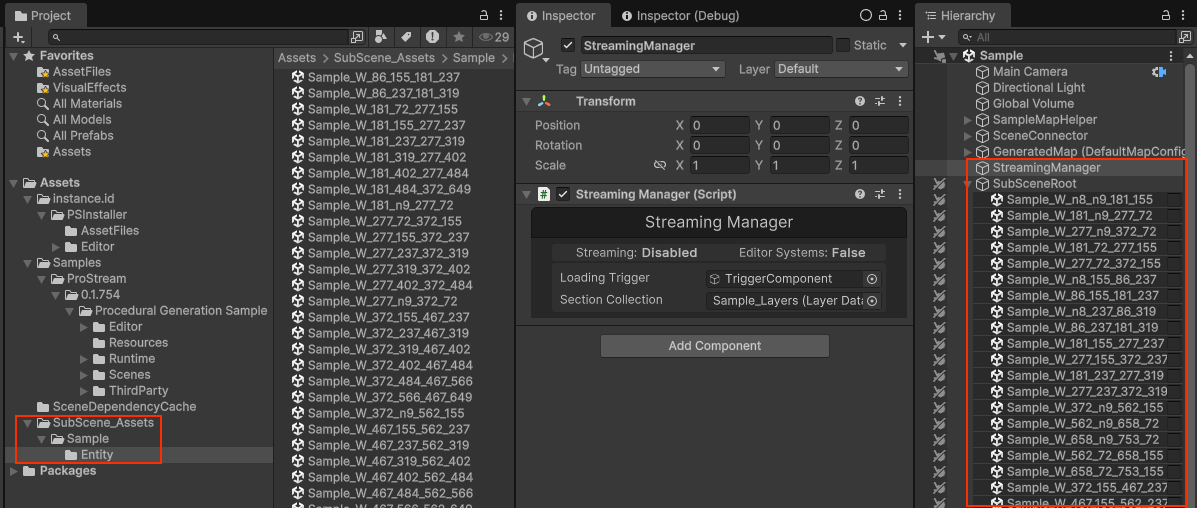
8) Process Complete
What Was Created
During the "Create SubScenes" process, the following assets/components were generated:
- SubScene Asset Files: Unity SubScene Assets stored in
Assets/SubScene_Assets/Sample/Entity/ - SubScene GameObjects: SubScene GameObjects are located in the hierarchy under the
SubSceneRootGameObject - StreamingManager:
StreamingManagerorchestrates editor and runtime streaming systems
Next Steps
Ready to Validate
At this point, the scene is fully configured and ready to use.
You can now play the scene and test the streaming functionality.